Environment Specification:
We have provisioned a minimally installed CentOS 8 virtual machine with following specifications.
- CPU – 3.4 Ghz (2 cores)
- Memory – 8 GB
- Storage – 80 GB
- Operating System – CentOS 8.1
- Hostname – oracle-db-19c.centlinux.com
- IP Address – 192.168.116.206 /24
Update CentOS 8 Software Packages:
Connect with oracle-db-19c.centlinux.com as root user by using a SSH tool such as PuTTY.
It is a good practice to always update Linux software packages before installation and configuration of any server. Software packages are updated very frequently in online yum repositories and we can install them conveniently by using dnf command.
Update CentOS 8 software packages as follows.
[root@oracle-db-19c ~]# dnf update -y
...
Upgraded:
  coreutils-8.30-6.el8_1.1.x86_64
  coreutils-common-8.30-6.el8_1.1.x86_64
  firewalld-0.7.0-5.el8_1.1.noarch
  firewalld-filesystem-0.7.0-5.el8_1.1.noarch
  kernel-tools-4.18.0-147.8.1.el8_1.x86_64
  kernel-tools-libs-4.18.0-147.8.1.el8_1.x86_64
  kexec-tools-2.0.19-12.el8_1.2.x86_64
  libsss_autofs-2.2.0-19.el8_1.1.x86_64
  libsss_certmap-2.2.0-19.el8_1.1.x86_64
  libsss_idmap-2.2.0-19.el8_1.1.x86_64
  libsss_nss_idmap-2.2.0-19.el8_1.1.x86_64
  libsss_sudo-2.2.0-19.el8_1.1.x86_64
  nftables-1:0.9.0-14.el8_1.1.x86_64
  openssl-1:1.1.1c-2.el8_1.1.x86_64
  openssl-libs-1:1.1.1c-2.el8_1.1.x86_64
  python3-firewall-0.7.0-5.el8_1.1.noarch
  python3-perf-4.18.0-147.8.1.el8_1.x86_64
  python3-rpm-4.14.2-26.el8_1.x86_64
  rpm-4.14.2-26.el8_1.x86_64
  rpm-build-libs-4.14.2-26.el8_1.x86_64
  rpm-libs-4.14.2-26.el8_1.x86_64
  rpm-plugin-selinux-4.14.2-26.el8_1.x86_64
  rpm-plugin-systemd-inhibit-4.14.2-26.el8_1.x86_64
  sssd-client-2.2.0-19.el8_1.1.x86_64
  sssd-common-2.2.0-19.el8_1.1.x86_64
  sssd-kcm-2.2.0-19.el8_1.1.x86_64
  sssd-nfs-idmap-2.2.0-19.el8_1.1.x86_64
  systemd-239-18.el8_1.5.x86_64
  systemd-libs-239-18.el8_1.5.x86_64
  systemd-pam-239-18.el8_1.5.x86_64
  systemd-udev-239-18.el8_1.5.x86_64

Installed:
  kernel-4.18.0-147.8.1.el8_1.x86_64
  kernel-core-4.18.0-147.8.1.el8_1.x86_64
  kernel-modules-4.18.0-147.8.1.el8_1.x86_64

Removed:
  kernel-4.18.0-80.el8.x86_64              kernel-core-4.18.0-80.el8.x86_64
  kernel-modules-4.18.0-80.el8.x86_64

Complete!
Configure Local DNS Resolver in CentOS 8:
It is necessary to configure proper name resolution before installing Oracle Database 19c on CentOS 8 as well as other Linux distros.
If you are using a DNS server for your network then you can configure the name resolution within your DNS Server otherwise you can use Local DNS Resolver for name resolution of your Oracle database server.
Add the required name resolution directive in Local DNS Resolver (/etc/hosts) file.
[root@oracle-db-19c ~]# echo "192.168.116.206 oracle-db-19c.centlinux.com oracle-db-19c" >> /etc/hosts
Disable Transparent HugePages in CentOS 8:
Oracle recommends that you disable Transparent HugePages, because they may cause delays in accessing memory that can result in node restarts in Oracle RAC environments and performance issues or delays for Oracle Database single instances. Instead, Oracle recommends using Standard HugePages for Linux based operating systems.
Transparent HugePages are enable by default in EL (Enterprise Linux) 6 or later.
Verify that Transparent HugePages are enabled on our CentOS 8 server.
[root@oracle-db-19c ~]# cat /sys/kernel/mm/transparent_hugepage/enabled
[always] madvise never
[always] flag shows that the Transparent HugePages are in use by our CentOS 8 server.
To disable Transparent HugePages, we need to edit GRUB configurations.
[root@oracle-db-19c ~]# vi /etc/default/grub
Add ‘transparent_hugepage=never’ at the end of GRUB_CMDLINE_LINUX parameter. After editing, this directive should be look like this.
GRUB_CMDLINE_LINUX="resume=/dev/mapper/cl-swap rd.lvm.lv=cl/root rd.lvm.lv=cl/swap rhgb quiet transparent_hugepage=never"
Generate /boot/grub2/grub.cfg file by using modified configurations.
[root@oracle-db-19c ~]# grub2-mkconfig -o /boot/grub2/grub.cfg
Generating grub configuration file ...
done
Reboot the CentOS 8 machine to apply changes.
[root@oracle-db-19c ~]# systemctl reboot
After reboot, check status of Transparent HugePages again.
[root@oracle-db-19c ~]# cat /sys/kernel/mm/transparent_hugepage/enabled
always madvise [never]
Transparent HugePages has been disabled now.
Install Oracle Database 19c Prerequisites on CentOS 8:
Oracle Database 19c requires some software packages, therefore, we are installing these packages before moving forward.
We can install Oracle Database 19c prerequisites using dnf command.
[root@oracle-db-19c ~]# dnf install -y bc \
> binutils \
> elfutils-libelf \
> elfutils-libelf-devel \
> fontconfig-devel \
> glibc \
> glibc-devel \
> ksh \
> libaio \
> libaio-devel \
> libXrender \
> libXrender-devel \
> libX11 \
> libXau \
> libXi \
> libXtst \
> libgcc \
> librdmacm-devel \
> libstdc++ \
> libstdc++-devel \
> libxcb \
> make \
> net-tools \
> smartmontools \
> sysstat \
> unzip \
> libnsl \
> libnsl2
...
Installed:
  ksh-20120801-253.el8_1.x86_64
  libX11-1.6.7-1.el8.x86_64
  libXau-1.0.8-13.el8.x86_64
  libXi-1.7.9-7.el8.x86_64
  libXrender-0.9.10-7.el8.x86_64
  libXrender-devel-0.9.10-7.el8.x86_64
  libXtst-1.2.3-7.el8.x86_64
  libstdc++-devel-8.3.1-4.5.el8.x86_64
  libxcb-1.13-5.el8.x86_64
  sysstat-11.7.3-2.el8.x86_64
  bc-1.07.1-5.el8.x86_64
  binutils-2.30-58.el8_1.2.x86_64
  elfutils-libelf-devel-0.176-5.el8.x86_64
  fontconfig-devel-2.13.1-3.el8.x86_64
  glibc-devel-2.28-72.el8_1.1.x86_64
  libaio-devel-0.3.112-1.el8.x86_64
  libnsl-2.28-72.el8_1.1.x86_64
  make-1:4.2.1-9.el8.x86_64
  net-tools-2.0-0.51.20160912git.el8.x86_64
  rdma-core-devel-22.3-1.el8.x86_64
  smartmontools-1:6.6-3.el8.x86_64
  unzip-6.0-41.el8.x86_64
  libX11-common-1.6.7-1.el8.noarch
  libX11-devel-1.6.7-1.el8.x86_64
  libX11-xcb-1.6.7-1.el8.x86_64
  libXau-devel-1.0.8-13.el8.x86_64
  libXext-1.3.3-9.el8.x86_64
  libxcb-devel-1.13-5.el8.x86_64
  xorg-x11-proto-devel-2018.4-1.el8.noarch
  bzip2-devel-1.0.6-26.el8.x86_64
  dejavu-fonts-common-2.35-6.el8.noarch
  dejavu-sans-fonts-2.35-6.el8.noarch
  expat-devel-2.2.5-3.el8.x86_64
  fontconfig-2.13.1-3.el8.x86_64
  fontpackages-filesystem-1.44-22.el8.noarch
  freetype-devel-2.9.1-4.el8.x86_64
  glibc-headers-2.28-72.el8_1.1.x86_64
  ibacm-22.3-1.el8.x86_64
  kernel-headers-4.18.0-147.8.1.el8_1.x86_64
  libibumad-22.3-1.el8.x86_64
  libibverbs-22.3-1.el8.x86_64
  libpng-devel-2:1.6.34-5.el8.x86_64
  librdmacm-22.3-1.el8.x86_64
  libuuid-devel-2.32.1-17.el8.x86_64
  libxcrypt-devel-4.1.1-4.el8.x86_64
  lm_sensors-libs-3.4.0-20.20180522git70f7e08.el8.x86_64
  perl-Carp-1.42-396.el8.noarch
  perl-Errno-1.28-416.el8.x86_64
  perl-Exporter-5.72-396.el8.noarch
  perl-File-Path-2.15-2.el8.noarch
  perl-IO-1.38-416.el8.x86_64
  perl-PathTools-3.74-1.el8.x86_64
  perl-Scalar-List-Utils-3:1.49-2.el8.x86_64
  perl-Socket-4:2.027-3.el8.x86_64
  perl-Text-Tabs+Wrap-2013.0523-395.el8.noarch
  perl-Unicode-Normalize-1.25-396.el8.x86_64
  perl-constant-1.33-396.el8.noarch
  perl-interpreter-4:5.26.3-416.el8.x86_64
  perl-libs-4:5.26.3-416.el8.x86_64
  perl-macros-4:5.26.3-416.el8.x86_64
  perl-parent-1:0.237-1.el8.noarch
  perl-threads-1:2.21-2.el8.x86_64
  perl-threads-shared-1.58-2.el8.x86_64
  rdma-core-22.3-1.el8.x86_64
  zlib-devel-1.2.11-10.el8.x86_64

Complete!
Create Users and Groups for Oracle Database 19c:
Create Linux users and groups as required by Oracle Database 19c.
[root@oracle-db-19c ~]# groupadd -g 1501 oinstall
[root@oracle-db-19c ~]# groupadd -g 1502 dba
[root@oracle-db-19c ~]# groupadd -g 1503 oper
[root@oracle-db-19c ~]# groupadd -g 1504 backupdba
[root@oracle-db-19c ~]# groupadd -g 1505 dgdba
[root@oracle-db-19c ~]# groupadd -g 1506 kmdba
[root@oracle-db-19c ~]# groupadd -g 1507 racdba
[root@oracle-db-19c ~]# useradd -u 1501 -g oinstall -G dba,oper,backupdba,dgdba,kmdba,racdba oracle
[root@oracle-db-19c ~]# echo "oracle" | passwd oracle --stdin
Changing password for user oracle.
passwd: all authentication tokens updated successfully.
Set Security limits for Oracle user:
Create 30-oracle.conf configuration file in /etc/security/limits.d directory, to set the security limits for the oracle user.
[root@oracle-db-19c ~]# vi /etc/security/limits.d/30-oracle.conf
And add following directives therein.
oracle   soft   nofile    1024
oracle   hard   nofile    65536
oracle   soft   nproc    16384
oracle   hard   nproc    16384
oracle   soft   stack    10240
oracle   hard   stack    32768
oracle   hard   memlock    134217728
oracle   soft   memlock    134217728
Adjust Kernel Parameters in CentOS 8:
Set the following Kernel parameters as required by the Oracle Database 19c.
Create 98-oracle.conf configuration file in /etc/sysctl.d directory.
[root@oracle-db-19c ~]# vi /etc/sysctl.d/98-oracle.conf
And add set following Kernel parameters in this file.
fs.file-max = 6815744
kernel.sem = 250 32000 100 128
kernel.shmmni = 4096
kernel.shmall = 1073741824
kernel.shmmax = 4398046511104
kernel.panic_on_oops = 1
net.core.rmem_default = 262144
net.core.rmem_max = 4194304
net.core.wmem_default = 262144
net.core.wmem_max = 1048576
net.ipv4.conf.all.rp_filter = 2
net.ipv4.conf.default.rp_filter = 2
fs.aio-max-nr = 1048576
net.ipv4.ip_local_port_range = 9000 65500
Reload Kernel parameters now by using sysctl command.
[root@oracle-db-19c ~]# sysctl -p
Configure SELinux Mode in CentOS 8:
Persistently set SELinux mode to permissive.
[root@oracle-db-19c ~]# sed -i 's/^SELINUX=.*/SELINUX=permissive/g' /etc/selinux/config
[root@oracle-db-19c ~]# setenforce permissive
Linux Firewall Configuration for Oracle Database 19c:
Allow Oracle SQL* Net Listener port 1521/tcp in CentOS 8 Firewall.
[root@oracle-db-19c ~]# firewall-cmd --permanent --add-port=1521/tcp
success
[root@oracle-db-19c ~]# firewall-cmd --reload
success
Create Directories for Oracle Database 19c:
To install Oracle Database 19c software, create the necessary directories and adjust the ownership and permissions on these directories.
[root@oracle-db-19c ~]# mkdir -p /u01/app/oracle/product/19.3.0/dbhome_1
[root@oracle-db-19c ~]# mkdir -p /u02/oradata
[root@oracle-db-19c ~]# chown -R oracle:oinstall /u01 /u02
[root@oracle-db-19c ~]# chmod -R 775 /u01 /u02
Here, we have created two directories, /u01 for the Oracle RDBMS and /u02 for the Oracle Databases.
Configure Linux Environment for Oracle User:
Connect as oracle user.
[root@oracle-db-19c ~]# su - oracle
[oracle@oracle-db-19c ~]$
Edit oracle user’s .bash_profile.
[oracle@oracle-db-19c ~]$ vi ~/.bash_profile
And add following configurations at the end of this file.
# Oracle Settings
export TMP=/tmp
export TMPDIR=$TMP

export ORACLE_HOSTNAME=oracle-db-19c.centlinux.com
export ORACLE_UNQNAME=cdb1
export ORACLE_BASE=/u01/app/oracle
export ORACLE_HOME=$ORACLE_BASE/product/19.3.0/dbhome_1
export ORA_INVENTORY=/u01/app/oraInventory
export ORACLE_SID=cdb1
export PDB_NAME=pdb1
export DATA_DIR=/u02/oradata

export PATH=$ORACLE_HOME/bin:$PATH

export LD_LIBRARY_PATH=$ORACLE_HOME/lib:/lib:/usr/lib
export CLASSPATH=$ORACLE_HOME/jlib:$ORACLE_HOME/rdbms/jlib
Execute .bash_profile to set environment for the current session.
[oracle@oracle-db-19c ~]$ source ~/.bash_profile
Install Oracle Database 19c on CentOS 8 in Silent mode:
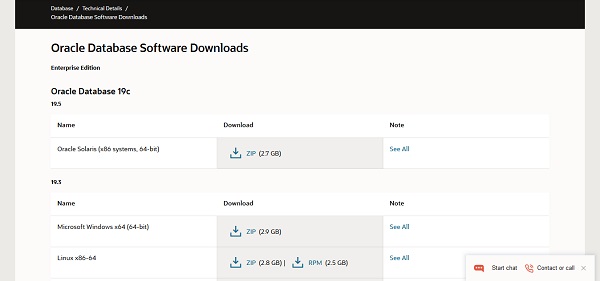
You can download Oracle Database 19c from Oracle website. You need to create a free Oracle Single Sign-On account to login and download it.

We have downloaded Oracle Database 19c (19.3) for Linux and transferred it into home directory of oracle user.
Unzip the downloaded zip file to ORACLE_HOME directory.
[oracle@oracle-db-19c ~]$ unzip LINUX.X64_193000_db_home.zip -d $ORACLE_HOME
Oracle Database 19c installer have problems detecting CentOS 8 operating system, however, we can workaround it, by setting an environment variable before starting installation.
[oracle@oracle-db-19c ~]$ export CV_ASSUME_DISTID=RHEL8.0
Go to ORACLE_HOME directory and start installation.
[oracle@oracle-db-19c ~]$ cd $ORACLE_HOME
[oracle@oracle-db-19c dbhome_1]$ ./runInstaller -ignorePrereq -waitforcompletion -silent \
> oracle.install.option=INSTALL_DB_SWONLY \
> ORACLE_HOSTNAME=${ORACLE_HOSTNAME} \
> UNIX_GROUP_NAME=oinstall \
> INVENTORY_LOCATION=${ORA_INVENTORY} \
> ORACLE_HOME=${ORACLE_HOME} \
> ORACLE_BASE=${ORACLE_BASE} \
> oracle.install.db.InstallEdition=EE \
> oracle.install.db.OSDBA_GROUP=dba \
> oracle.install.db.OSBACKUPDBA_GROUP=backupdba \
> oracle.install.db.OSDGDBA_GROUP=dgdba \
> oracle.install.db.OSKMDBA_GROUP=kmdba \
> oracle.install.db.OSRACDBA_GROUP=racdba \
> SECURITY_UPDATES_VIA_MYORACLESUPPORT=false \
> DECLINE_SECURITY_UPDATES=true
Launching Oracle Database Setup Wizard...

The response file for this session can be found at:
 /u01/app/oracle/product/19.3.0/dbhome_1/install/response/db_2020-04-28_02-44-19PM.rsp

You can find the log of this install session at:
 /tmp/InstallActions2020-04-28_02-44-19PM/installActions2020-04-28_02-44-19PM.log

As a root user, execute the following script(s):
        1. /u01/app/oraInventory/orainstRoot.sh
        2. /u01/app/oracle/product/19.3.0/dbhome_1/root.sh
Successfully Setup Software. Moved the install session logs to: /u01/app/oraInventory/logs/InstallActions2020-04-28_02-44-19PM
Connect as root user and execute post-installation scripts.
[oracle@oracle-db-19c dbhome_1]$ su -
Password:
Last login: Tue Apr 28 14:09:02 PKT 2020 on pts/2
[root@oracle-db-19c ~]# /u01/app/oraInventory/orainstRoot.sh
Changing permissions of /u01/app/oraInventory.
Adding read,write permissions for group.
Removing read,write,execute permissions for world.

Changing groupname of /u01/app/oraInventory to oinstall.
The execution of the script is complete.
[root@oracle-db-19c ~]# /u01/app/oracle/product/19.3.0/dbhome_1/root.sh
Check /u01/app/oracle/product/19.3.0/dbhome_1/install/root_oracle-db-19c.centlinux.com_2020-04-28_15-01-30-090367646.log for the output of root script
Oracle Database 19c has been installed on CentOS 8 server.
Create Oracle 19c Multitenant Database in Silent Mode:
Start Oracle Listener by using following command.
[oracle@oracle-db-19c ~]$ lsnrctl start

LSNRCTL for Linux: Version 19.0.0.0.0 - Production on 28-APR-2020 15:04:29

Copyright (c) 1991, 2019, Oracle.  All rights reserved.

Starting /u01/app/oracle/product/19.3.0/dbhome_1/bin/tnslsnr: please wait...

TNSLSNR for Linux: Version 19.0.0.0.0 - Production
Log messages written to /u01/app/oracle/diag/tnslsnr/oracle-db-19c/listener/alert/log.xml
Listening on: (DESCRIPTION=(ADDRESS=(PROTOCOL=tcp)(HOST=oracle-db-19c.centlinux.com)(PORT=1521)))

Connecting to (ADDRESS=(PROTOCOL=tcp)(HOST=)(PORT=1521))
STATUS of the LISTENER
------------------------
Alias                     LISTENER
Version                   TNSLSNR for Linux: Version 19.0.0.0.0 - Production
Start Date                28-APR-2020 15:04:30
Uptime                    0 days 0 hr. 0 min. 0 sec
Trace Level               off
Security                  ON: Local OS Authentication
SNMP                      OFF
Listener Log File         /u01/app/oracle/diag/tnslsnr/oracle-db-19c/listener/alert/log.xml
Listening Endpoints Summary...
  (DESCRIPTION=(ADDRESS=(PROTOCOL=tcp)(HOST=oracle-db-19c.centlinux.com)(PORT=1521)))
The listener supports no services
The command completed successfully
Create Oracle 19c Multitenant database by using the following command.
[oracle@oracle-db-19c ~]$ dbca -silent -createDatabase \
> -templateName General_Purpose.dbc \
> -gdbname ${ORACLE_SID} -sid  ${ORACLE_SID} \
> -responseFile NO_VALUE \
> -characterSet AL32UTF8 \
> -sysPassword V3ryStr@ng \
> -systemPassword V3ryStr@ng \
> -createAsContainerDatabase true \
> -numberOfPDBs 1 \
> -pdbName ${PDB_NAME} \
> -pdbAdminPassword V3ryStr@ng \
> -databaseType MULTIPURPOSE \
> -automaticMemoryManagement false \
> -totalMemory 800 \
> -storageType FS \
> -datafileDestination "${DATA_DIR}" \
> -redoLogFileSize 50 \
> -emConfiguration NONE \
> -ignorePreReqs
Prepare for db operation
8% complete
Copying database files
31% complete
Creating and starting Oracle instance
32% complete
36% complete
40% complete
43% complete
46% complete
Completing Database Creation
51% complete
53% complete
54% complete
Creating Pluggable Databases
58% complete
77% complete
Executing Post Configuration Actions
100% complete
Database creation complete. For details check the logfiles at:
 /u01/app/oracle/cfgtoollogs/dbca/cdb1.
Database Information:
Global Database Name:cdb1
System Identifier(SID):cdb1
Look at the log file "/u01/app/oracle/cfgtoollogs/dbca/cdb1/cdb1.log" for further details.
Connect as root user and execute following command to enable autostart of Oracle Databases.
[oracle@oracle-db-19c ~]$ su -
Password:
Last login: Tue Apr 28 15:01:17 PKT 2020 on pts/2
[root@oracle-db-19c ~]# sed -i 's/:N$/:Y/g' /etc/oratab
Connect to SQL Shell by using sqlplus command.
[oracle@oracle-db-19c ~]$ sqlplus / as sysdba

SQL*Plus: Release 19.0.0.0.0 - Production on Tue Apr 28 15:57:06 2020
Version 19.3.0.0.0

Copyright (c) 1982, 2019, Oracle.  All rights reserved.


Connected to:
Oracle Database 19c Enterprise Edition Release 19.0.0.0.0 - Production
Version 19.3.0.0.0

SQL>
Enable Oracle Managed File (OMF) to simplify the creation of databases and database files.
SQL> ALTER SYSTEM SET DB_CREATE_FILE_DEST='/u02/oradata' SCOPE=BOTH;

System altered.
Enable autostart of Pluggable databases with startup of Container Database.
SQL> ALTER PLUGGABLE DATABASE PDB1 SAVE STATE;

Pluggable database altered.
Create SystemD Service for Oracle Database 19c on CentOS 8:
To configure autostart of Oracle Database 19c on CentOS 8, we have to write a SystemD service.
[root@oracle-db-19c ~]# vi /usr/lib/systemd/system/dbora.service
Add following lines of code in this file.
[Unit]
Description=Oracle Database Service
After=network.target

[Service]
Type=forking
ExecStart=/u01/app/oracle/product/19.3.0/dbhome_1/bin/dbstart /u01/app/oracle/product/19.3.0/dbhome_1
ExecStop=/u01/app/oracle/product/19.3.0/dbhome_1/bin/dbshut /u01/app/oracle/product/19.3.0/dbhome_1
User=oracle
TimeoutSec=300s

[Install]
WantedBy=multi-user.target
Execute following command to inform SystemD about changes in unit files.
[root@oracle-db-19c ~]# systemctl daemon-reload
Enable and start Oracle Database 19c service.
[root@oracle-db-19c ~]# systemctl enable --now dbora.service
Created symlink /etc/systemd/system/multi-user.target.wants/dbora.service â /usr/lib/systemd/system/dbora.service.
Verify the status of the Oracle Database 19c service.
[root@oracle-db-19c ~]# systemctl status dbora.service
â dbora.service - Oracle Database Service
   Loaded: loaded (/usr/lib/systemd/system/dbora.service; enabled; vendor prese>
   Active: active (running) since Tue 2020-04-28 16:01:39 PKT; 3s ago
  Process: 27957 ExecStart=/u01/app/oracle/product/19.3.0/dbhome_1/bin/dbstart >
    Tasks: 57 (limit: 12367)
   Memory: 1.0G
   CGroup: /system.slice/dbora.service
           ââ28067 ora_pmon_cdb1
           ââ28069 ora_clmn_cdb1
           ââ28071 ora_psp0_cdb1
           ââ28073 ora_vktm_cdb1
           ââ28077 ora_gen0_cdb1
           ââ28079 ora_mman_cdb1
           ââ28083 ora_gen1_cdb1
           ââ28086 ora_diag_cdb1
           ââ28088 ora_ofsd_cdb1
           ââ28091 ora_dbrm_cdb1
           ââ28093 ora_vkrm_cdb1
           ââ28095 ora_svcb_cdb1
           ââ28097 ora_pman_cdb1
           ââ28099 ora_dia0_cdb1
           ââ28101 ora_dbw0_cdb1
           ââ28103 ora_lgwr_cdb1
We have successfully installed Oracle Database 19c on CentOS 8 server and created a Multitenant Database in this server.
credit: https://www.centlinux.com/2020/04/install-oracle-database-19c-on-centos-8.html
