You can download it from here. Now, run the MySQL community installer. In MySQL Installed, you can view the list of installed products.
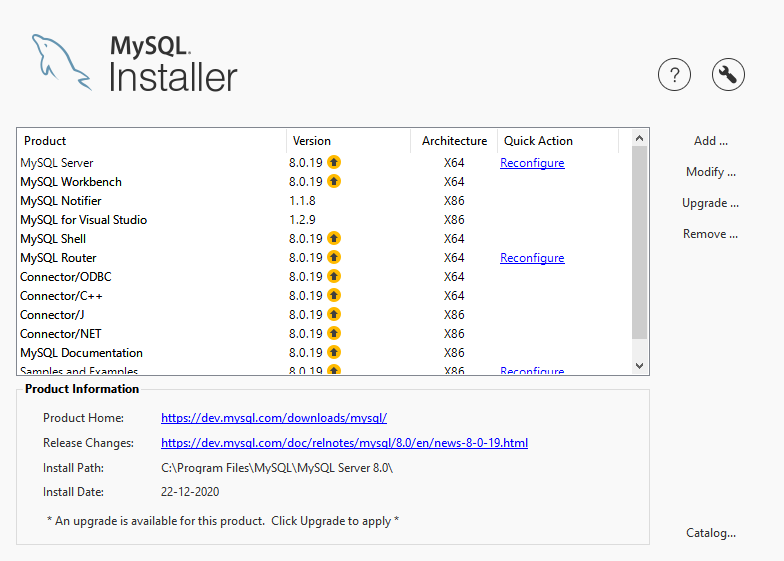
To add another instance of the MySQL Server, click on Add. In the Select Products screen, you can view the available version of the MySQL Server. We want to install a new instance of MySQL 8.0; therefore, Expand MySQL Server Expand MySQL Server 8.0.
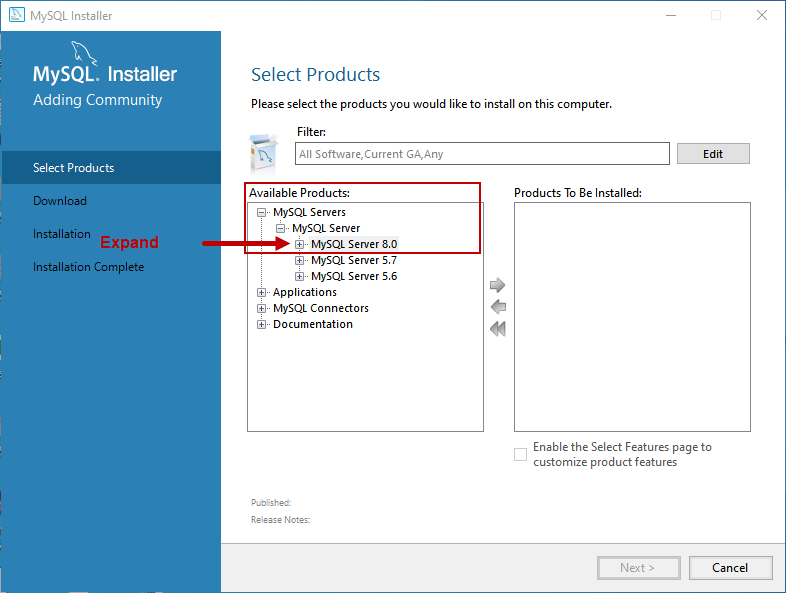
All versions are of MySQL 8.0 are disabled.
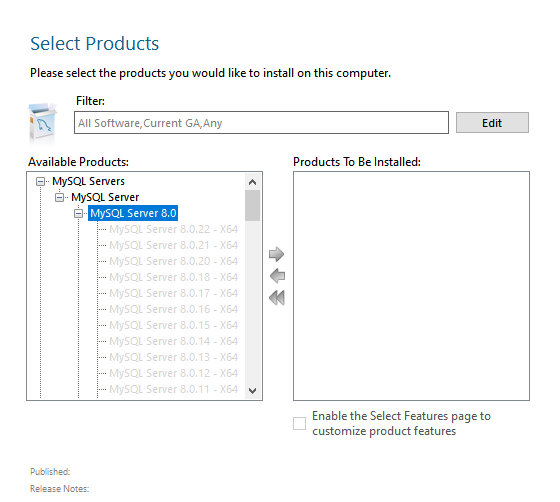
To view another version of MySQL, expand MySQL Server 5.7.
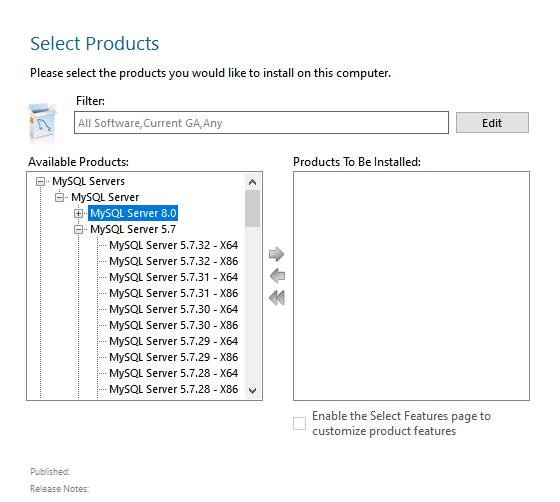
As you can see in the above screenshot, the version of MySQL 8.0 is greyed out, but the versions of MySQL Server 5.7 and 5.6 are enabled. This indicates that using the MySQL community installer, we can install a different version of MySQL but cannot install multiple instances of the same version. To run multiple instances, the second instance of MySQL must install as a windows service. The installation must be performed manually using a command prompt. We are using mysqld to install MySQL, and the step-by-step process is following.
- Create a new directory named MySQLDev in C:\ drive and copy the content of the MySQL base directory, data directory, and configuration file (my.ini) to the C:\ MySQLDev folder
- Rename the configuration file
- Update the configuration file by making the following changes
- Change the port
- Change the value of the base directory and the data directory
- Change the value of the named-pipe
- Start the manual installation of MySQL using the mysqld command. The installation uses the updated configuration file
- Start the service
- Connect to the new instance from MySQL workbench
- If required, change the password of the root user
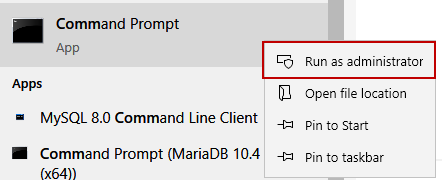
Let us perform the installation. Open the command prompt using an administrator account. To do that, Right-click on the Command prompt and select Run as Administrator.
Create the directory and copy the files
First, create a new directory named MySQLDev on C:\drive of the computer.
C:\> mkdir MySQLDev
Copy the content of the MYSQL base directory to C:\MySQLDev using the XCOPY command. If you have installed MySQL using default settings, the directory location is C:\Program Files\MySQL\MySQL Server 8.0. You can view the location of the base directory of the MySQL server from the Server Status screen of MySQL workbench.
C:\> xcopy C:\”Program Files”\MySQL\”MySQL Server 8.0″ C:\MySQLDev /E /H
Once the subdirectories and files of the MySQL base directory are copied, copy the data directory and configuration file to the C:\MySQLDev. The default location of the data directory is C:\ProgramData\MySQL\MySQL Server 8.0\Data.
XCOPY command to copy Data directory
C:\> xcopy C:\”ProgramData”\MySQL\”MySQL Server 8.0″\data C:\MySQLDev\Data /E /H
COPY Command to copy configuration file
C:\>copy C:\ProgramData\MySQL\”MySQL Server 8.0″\my.ini C:\MySQLDev
Rename the configuration file
Change the name of the configuration file named my.ini to MyDev.ini using the REN command.
C:\> ren C:\MySQLDev\my.ini MyDev.ini
Change the parameters in the configuration file
Now, let us change the values of the configuration parameters in the MyDEV.ini file. We are making changes in the following parameters:
| Parameter Name | Existing value | New Value |
| Port | 3306 | 2505 |
| Datadir | C:/ProgramData/MySQL/MySQL Server 8.0/Data | C:/MySQLDev/Data |
| Basedir | C:/Program Files/MySQL/MySQL Server 8.0/ | C:/MySQLDev |
| Share-memory-base-name | MYSQL | MYSQLDEV |
| Socket | MYSQL | MYSQLDEV |
To change the parameters, you can use any text editor. Make the changes as shown in the below image:

Save and close the configuration file.
Install MySQL using a new configuration file
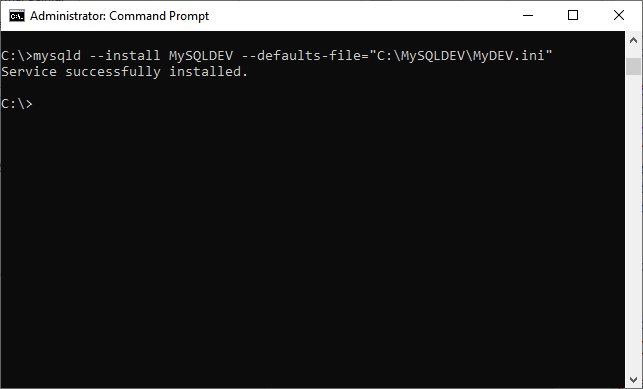
To manually install MySQL as a Windows service, use mysqld command line utility. The command is the following:
C:\> mysqld –install MySQLDEV –defaults-file=”C:\MySQLDEV\MyDEV.ini”
The service is installed successfully.
Once MySQL is installed as a windows service, let us start it.
Start MySQL instance
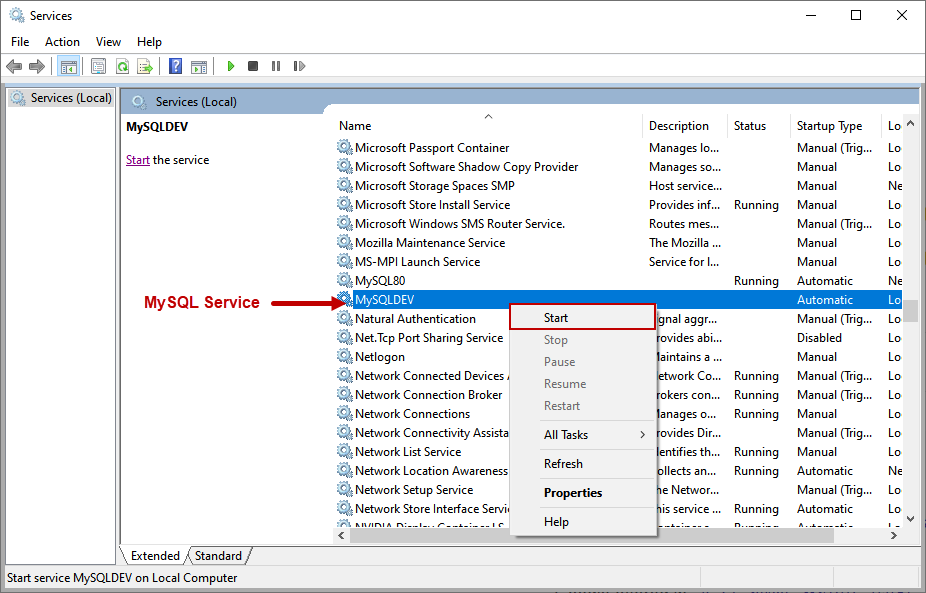
To start the service, open the control panel open Administrative Tools Open Services. In the Services console, you can see the MySQLDEV service is installed. Right-click on it and click on Start.
If the configuration is made correctly, then the service will be started successfully. Alternatively, you can start the MySQLDEV service by running the following command.
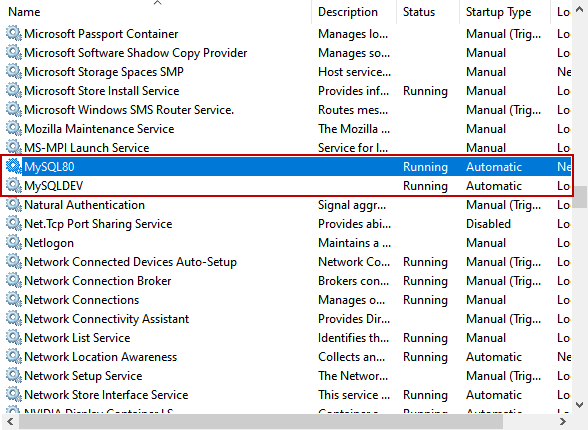
As you can see in the above image, both instances of MySQL are running. Let us verify the details of the configuration.
credit: https://www.sqlshack.com/learn-mysql-run-multiple-instances-of-mysql-server-on-windows-10